1.Creating a Communication Template with Tags.
.1Select Admin, on the bottom menu of UnderwriterCENTRAL
.2From the side menu, select Lookups > Common > Communication Tags
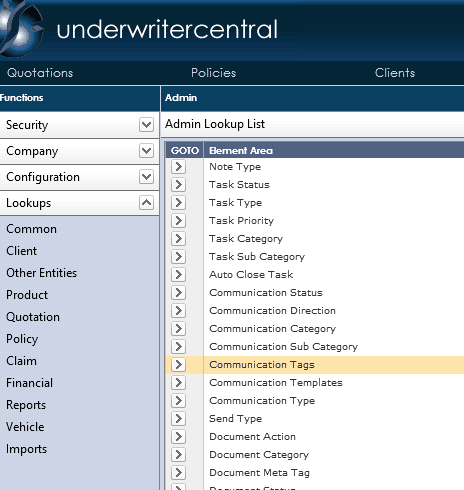
.3Select Add in the top right corner of the Communication Tag window to add a new row.
.4

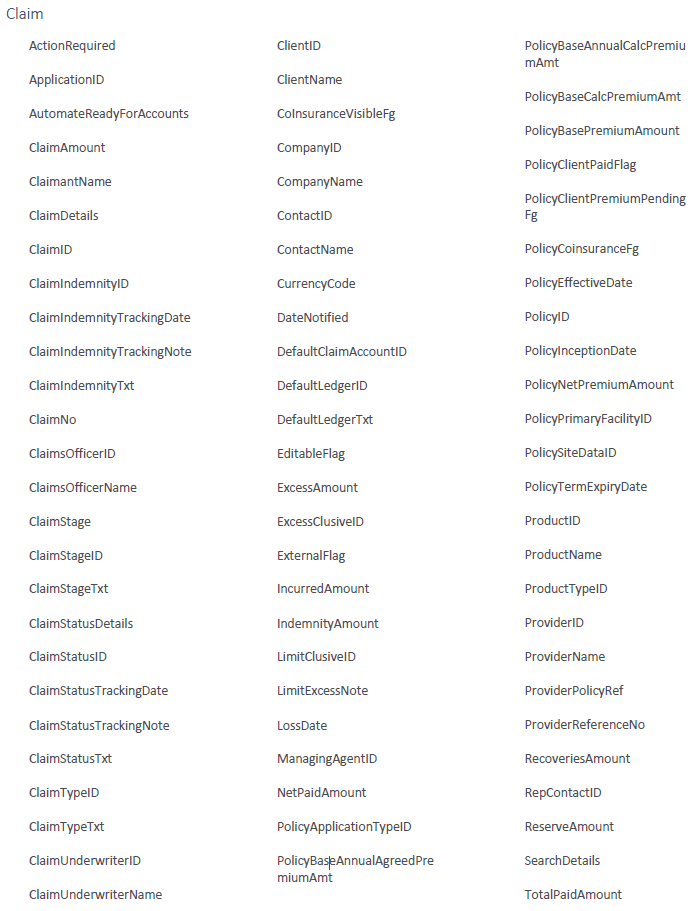
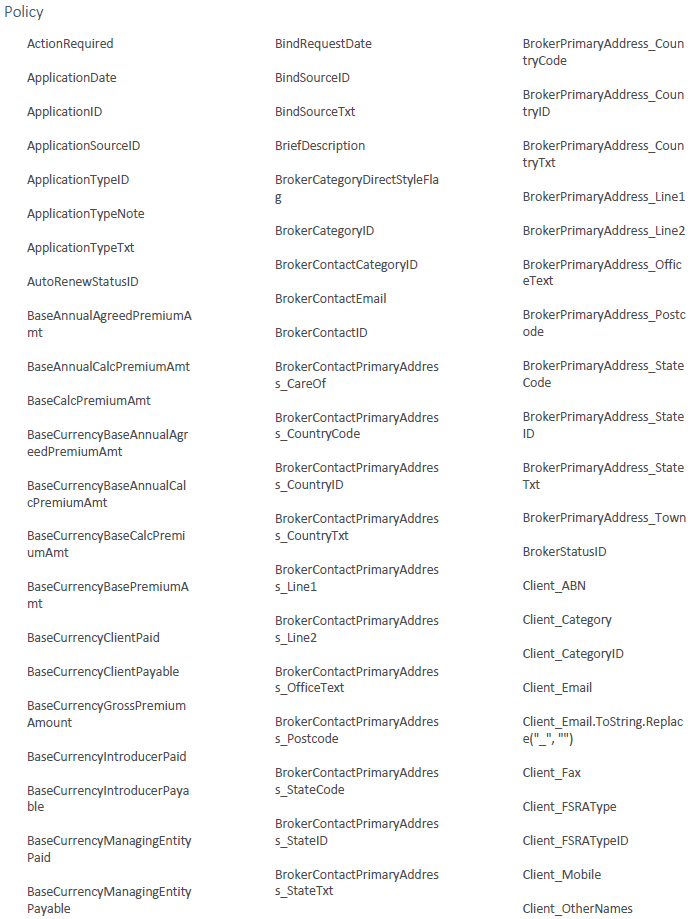
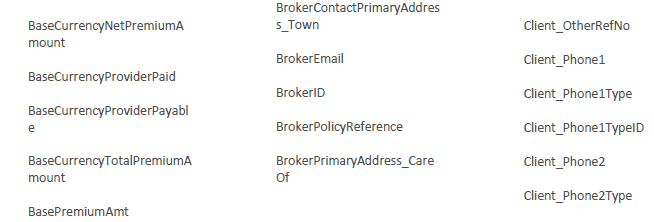
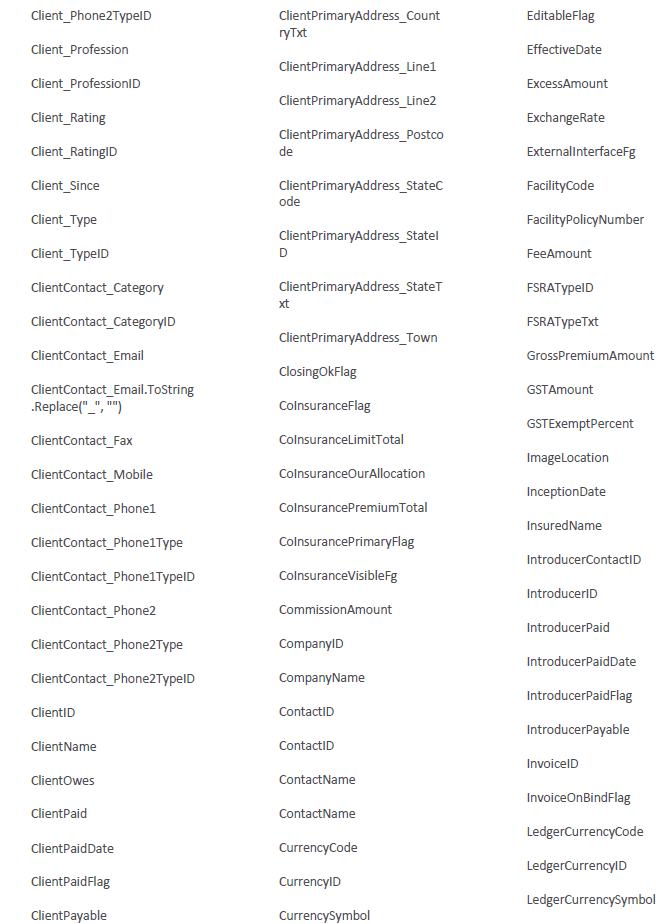
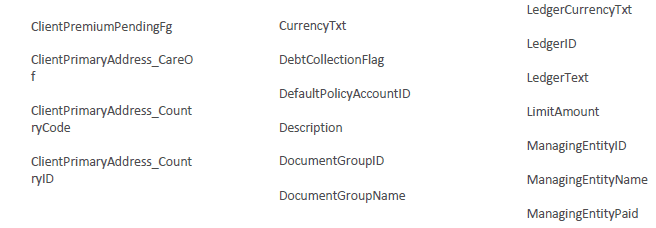
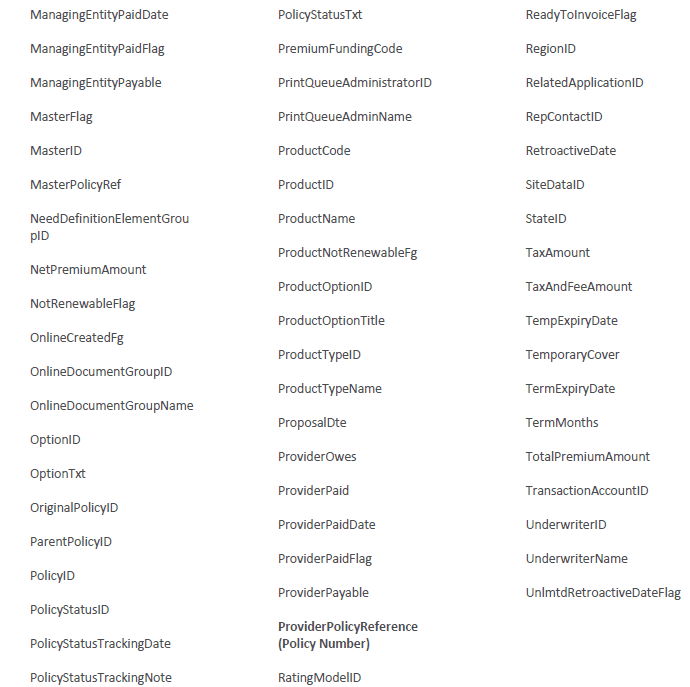
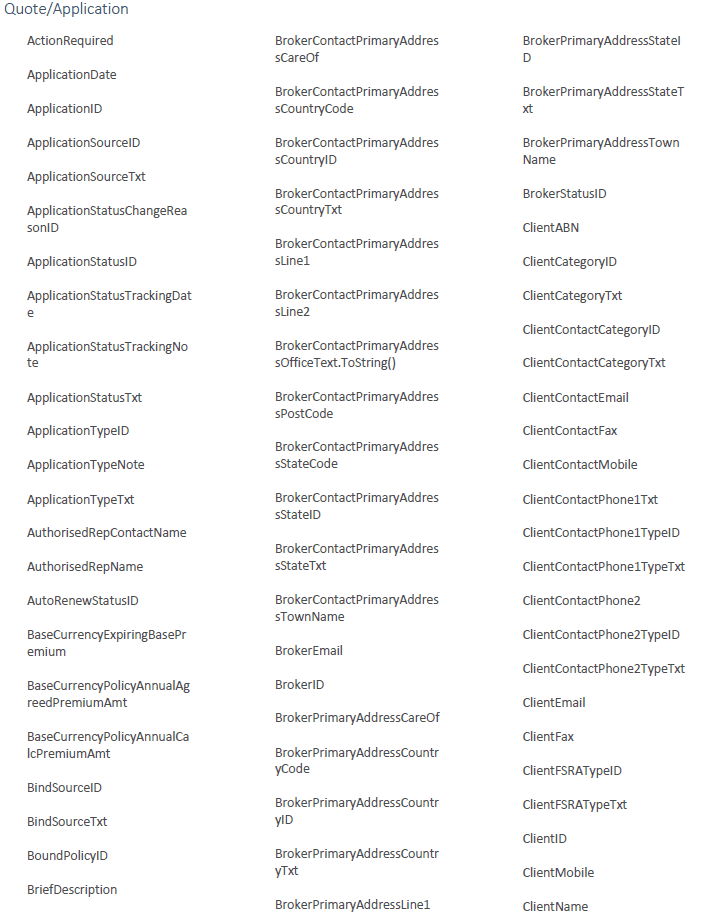
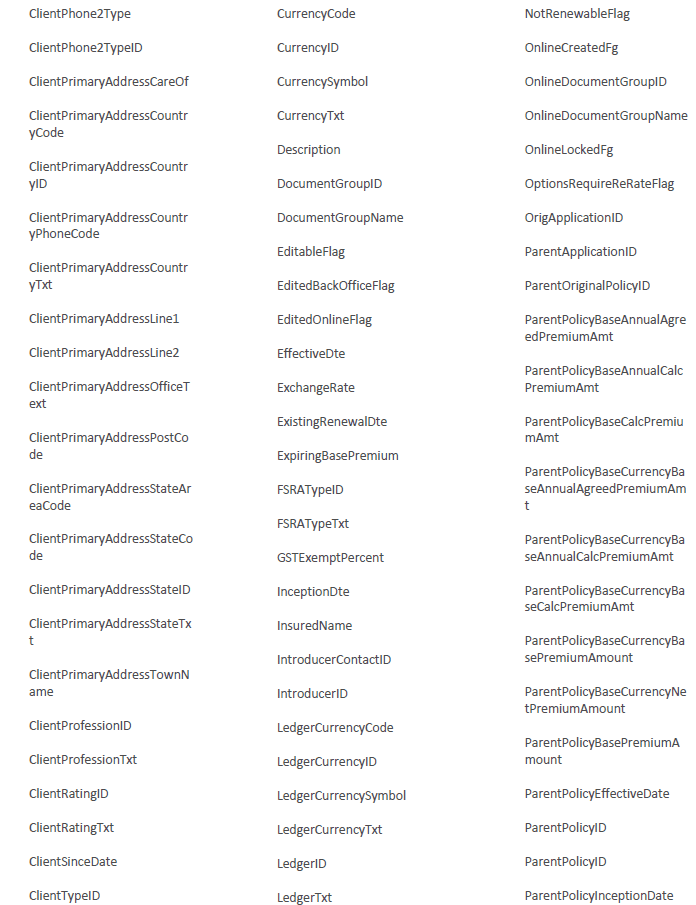
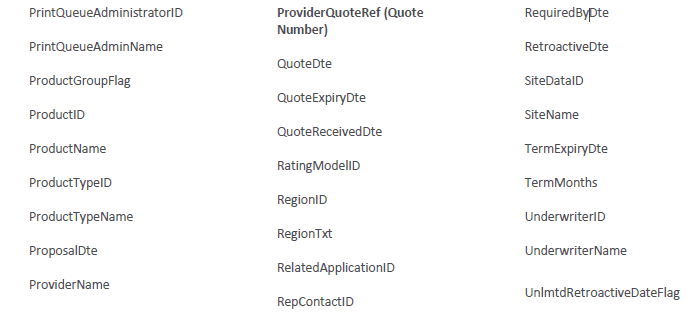
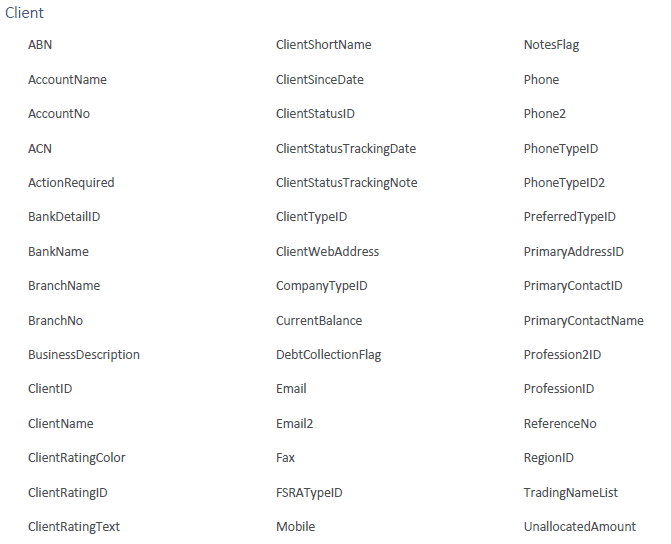
.5Select the View you wish to make a template for and add a Description and Field Name for that View (the Tagable Field Names available is located at the end of this document categorised by Modules). Click on Save when you are done. The view denotes which area of the system the tag will be available.
.6
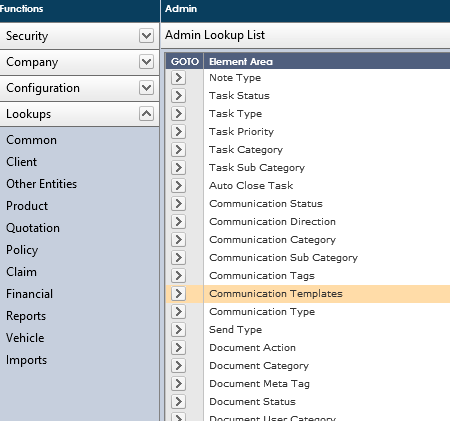
.7Navigate back up to the Admin Lookup List and select Communication Templates
.8Click on Add in the top right corner of Communication Templates window.
.9

.10Fill out the Title, Product, View and Subject fields according to the type of template you are creating and the type of product it is for.
.11
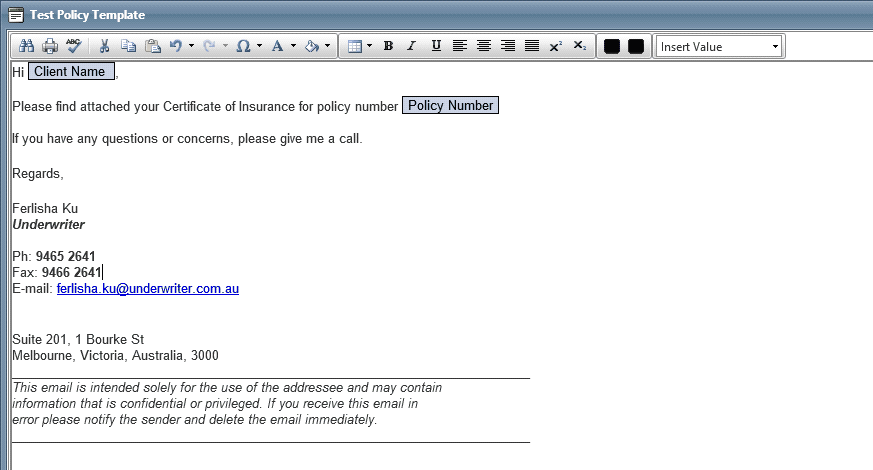
.12

.13Select the Template Detail arrow button, and design your template. Click on the Green Square button to save.
.14Click Save when you are back on the Communications Templates window.
2.Sending a Communication with a predefined Communication Template.
.1
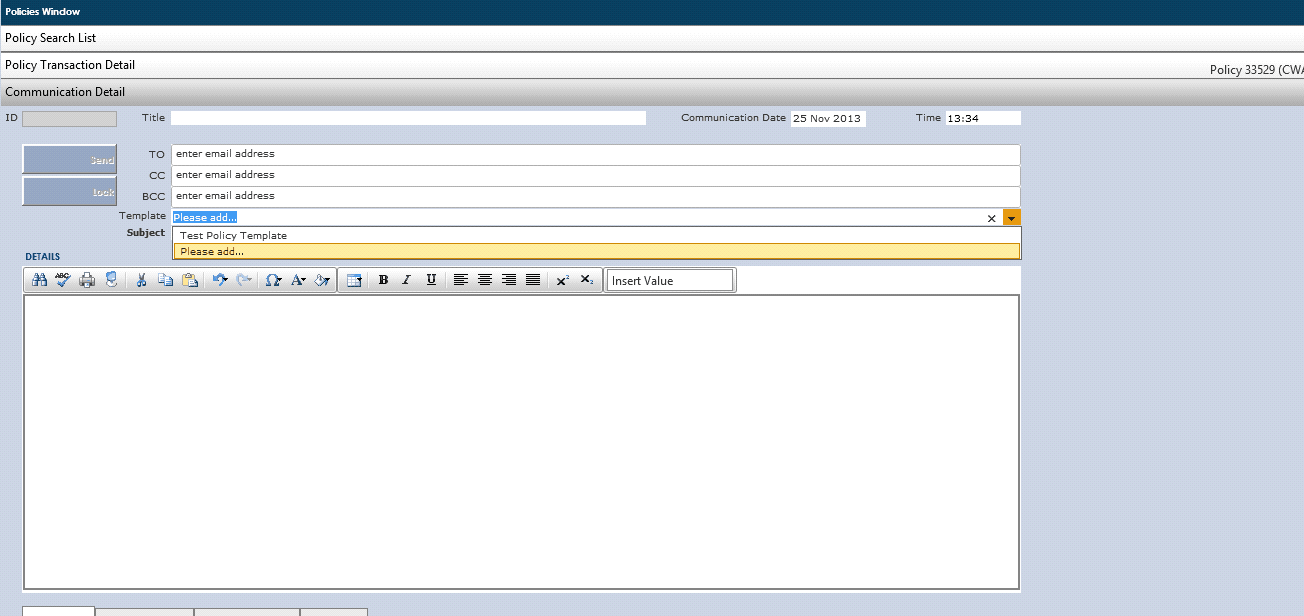
.2To add a predefined template in a Communication, select the desired template in the Template drop down box.
.3Your template will load up into the textbox, along with the generated tags.
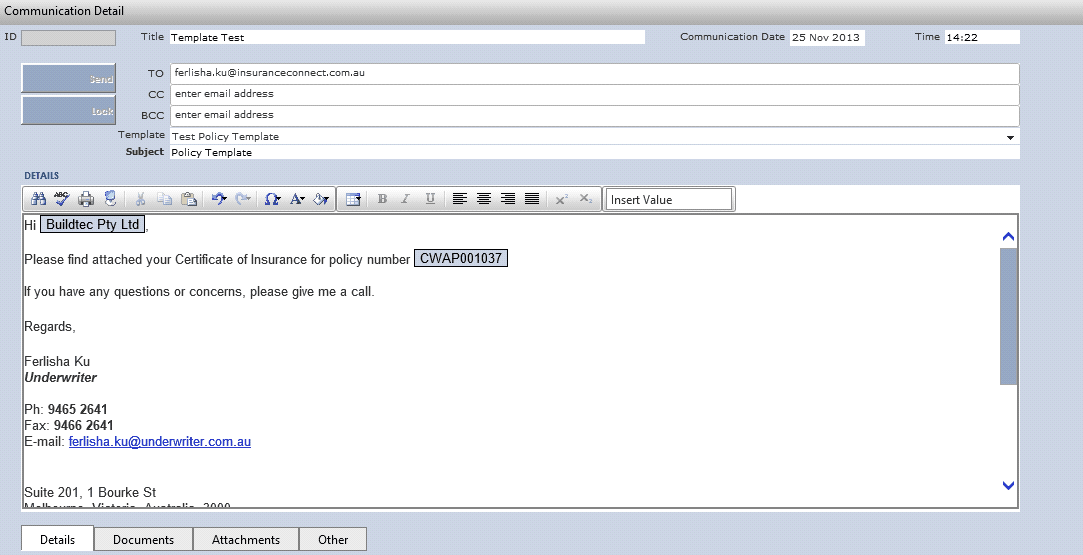
.4Fill in any other fields as required. If you have entered an email address for the client, it will default in the TO fields. This can be over typed or appended to using a semi colon after the email address (eg ferlisha.ku@iconnectors.co; ferlisha.ku@insuranceconnect.com.au)
.5
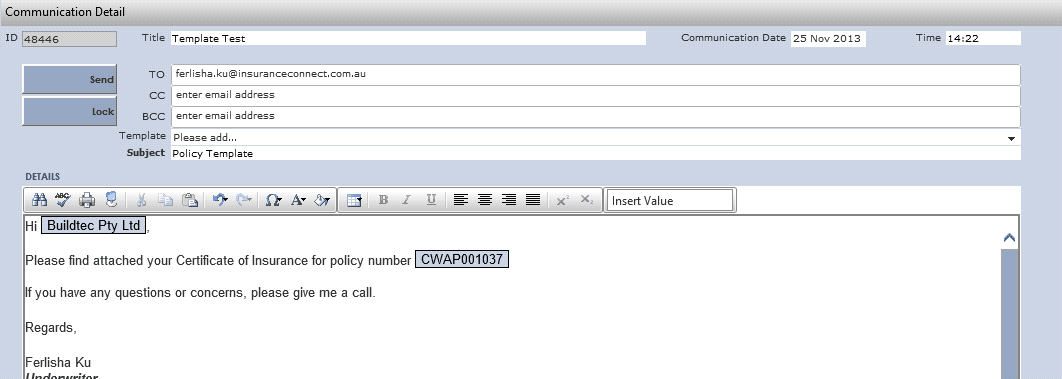
.6Save the Communication (The send button is now available)
.7Select Send. The Communication will be queued for sending and will go out within minutes. It will also be added to your sent items in Outlook.
.8The Communication will now be uneditable/locked
3.Inserting tag values in a Communication
.1
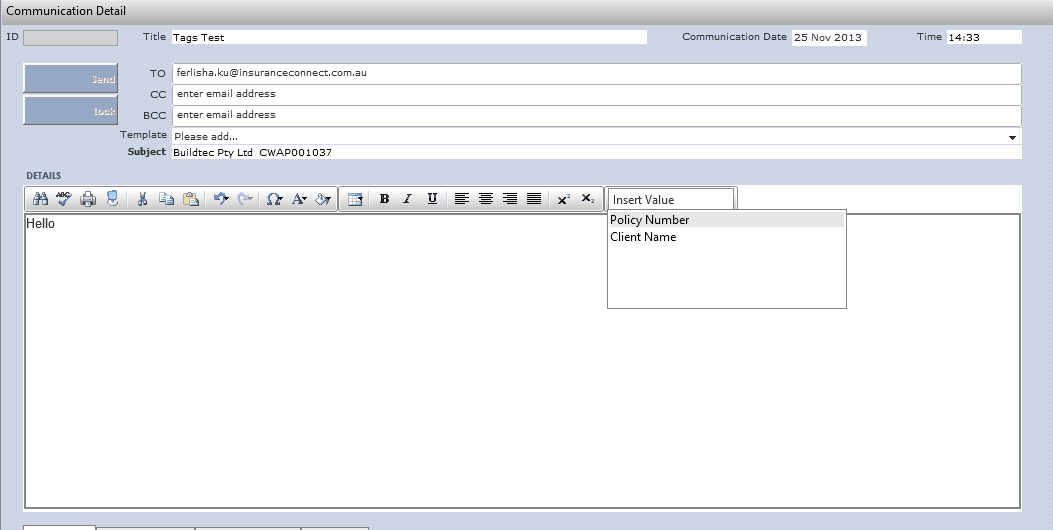
.2To manually add a tag value in a Communication, select the desired tag from the Insert Value option in the Communication Details window.
.3
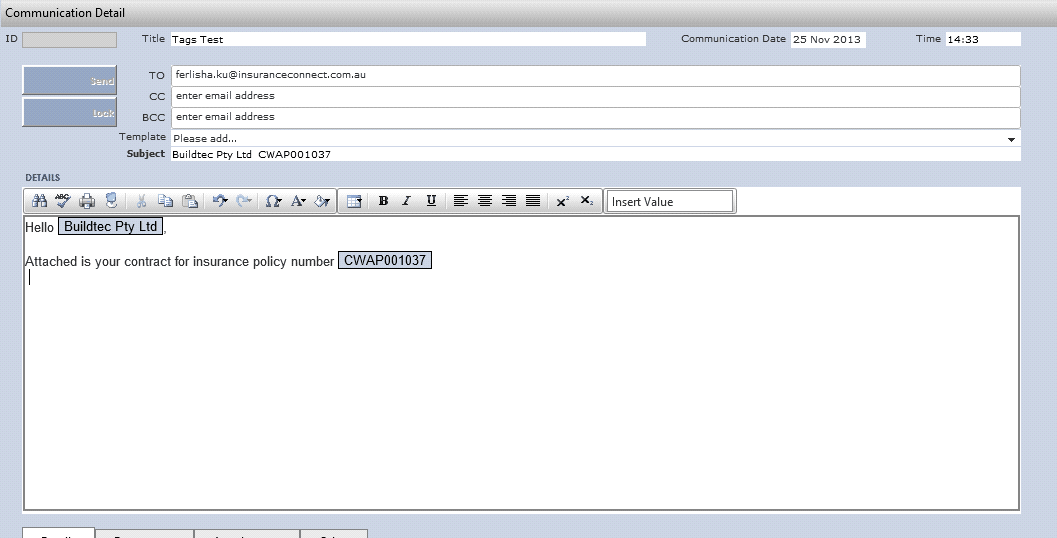
.4Your tags will appear in the textbox after it has been selected.
.5Fill in any other fields as required. If you have entered an email address for the client, it will default in the TO fields. This can be overtyped or appended to using a semi colon after the email address (eg ferlisha.ku@iconnectors.co; ferlisha.ku@insuranceconnect.com.au)
.6
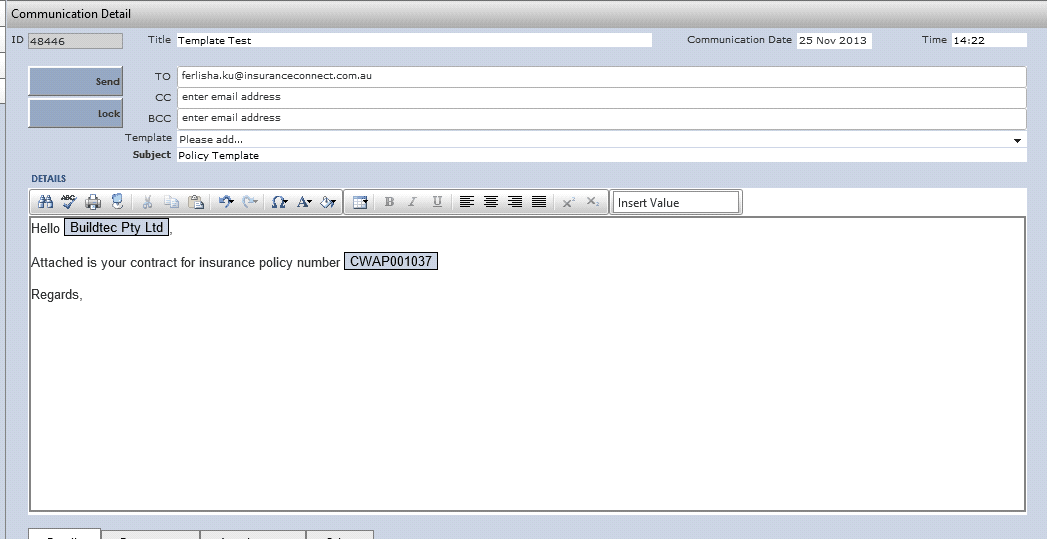
.7 Save the Communication (The send button is now available)
.8 Select Send. The Communication will be queued for sending and will go out within minutes. It will also be added to your sent items in Outlook.
.9The Communication will now be uneditable/locked
Tagable Fields per Module
