Click ![]() to create a new journal entry. This enables you to allocate monies between accounts.
to create a new journal entry. This enables you to allocate monies between accounts.

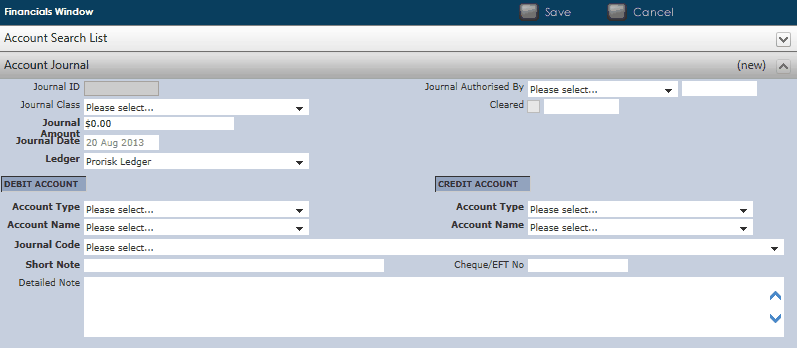
Proceed to fill out all details, noting new fields such as:
•Journal Class: Click on ![]() to select the journal class relating to the type of journal entry you are conducting from the drop down list. Notice that once the journal class is selected, the Credit and Debit Account Types will automatically default.
to select the journal class relating to the type of journal entry you are conducting from the drop down list. Notice that once the journal class is selected, the Credit and Debit Account Types will automatically default.
•Ledger: Choose the Ledger required.
•Account Type: This will default depending on the Journal Class you choose. To change the defaults, select the account from the drop down list.
•Account Name: This will default depending on the Journal class and Ledger you choose. To change the defaults, select the account from the drop down list.
•Journal Code: This will default to the appropriate ADP code.
•Short Note: This is a mandatory field. Provide a short explanation of your transfer.
•Cleared: Once the journal has been reconciled, the cleared box is ticked and a reconciliation date has been added beside it.
•Relates To: Click on ![]() to select the entity that this journal entry relates to.
to select the entity that this journal entry relates to.
Click ![]() to save all details.
to save all details.
To retrieve the journal entry, conduct an Account Search, choose the Account Name by checking the box ![]() to open the Account. The Transactions Tab will show all transaction history, including your recent Journal Entry.
to open the Account. The Transactions Tab will show all transaction history, including your recent Journal Entry.