| 1. | Click |
In the Side Menu, a number of fields have opened. Before inputting any details into the Main Window, these Fields will need to be completed.
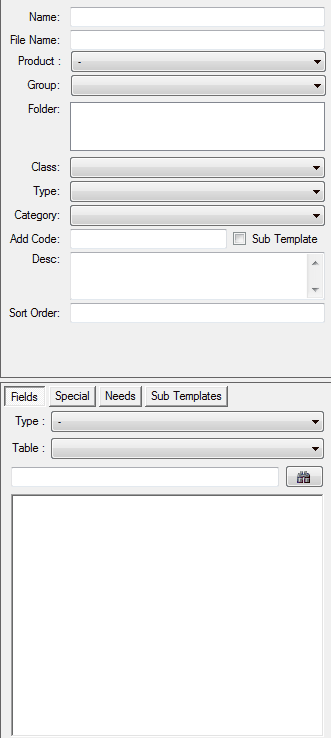
| 2. | Enter the template details as follows: |
•Name – Give the Template a name (eg: New Business Cover Letter).
•Filename – The Document Name will automatically default into this field. The Filename is the name the Document is stored as on the users's machine. To save the document under a different than that which has defaulted in, delete the Name and retype in the chosen Filename – Enter a name. The template cannot be amended once saved. If no entries are made in this field, the users Name will default here.
•Group – Use the Drop down list to select which Group this document is to be a member of. This will allow the user to report on documents belonging to certain groups.
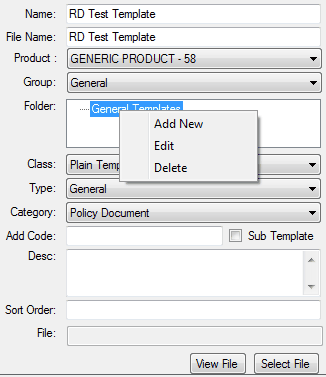
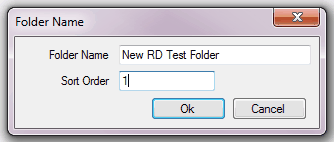
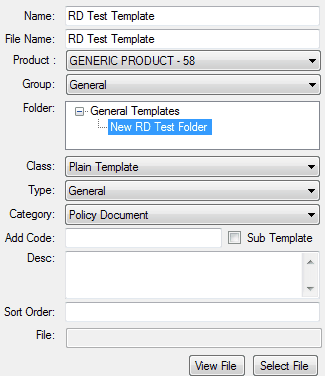
•Folder – The document will automatically be allocated to a folder once a Group is selected. The folder can be changed or a sub-folder added while in this field. Right click on the folder, the user can then either 'Add New' or 'Rename'.
| A] |
 |
| B] |
 |
| C] |
 |
•Class – Choose Plain Template.
•Type – There are currently 3 Types.
| 1.General |
| 2.Gold Seal |
| 3.Steadfast |
| You can select to save your Template as any Type. If you make the wrong selection or wish to change this after saving you can do so. |
•Category – Your options for selection here are directly related to the Group you selected earlier and the Folder you have selected. You are essentially selecting a Sub-Category to your Group here.
•Quick Add Code – It is advisable to allocate a logical code here e.g. for a CGU PDS for Home and Contents the Quick Add Code may be CGUPDSHC. For Documents with shorter names the Code may be document name; e.g. INVOICE.
•Description – Provide a brief Description of the Document in this area.
•Sort Order – This manages the appearance of documents in the Template selector and is definable on each template.
| 3. | Click on Select File. |
| 4. | Enter the text of your template into the document window. |
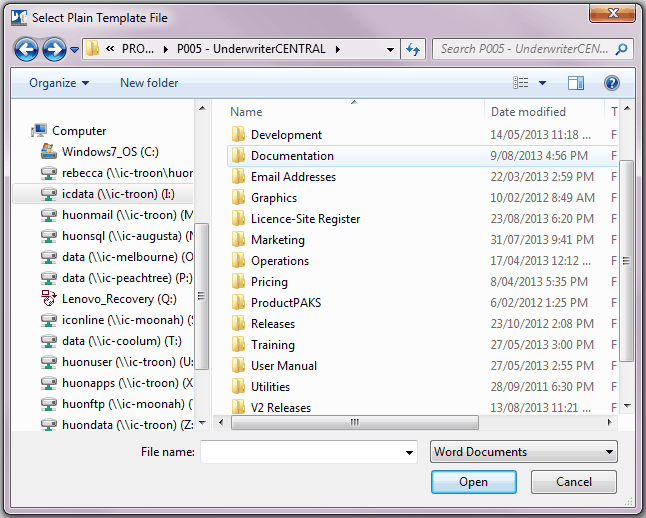 |
| 5. | You will notice that the File Path will appear in the File field. |
 |
| 6. | Save the template. |
| Note: To make changes to the Plain Template there are two ways to do this: |
•To change the version that is saved in the Document Template Editor, click View File, make changes and click save.
•To change the master file (the one originally set up in Word, as a PDF etc.), the user will need to find that file and make the changes from the users' Computer. To replace the Plain Template with this new version, find and open the Template, click Select File, and save the new version over the top of the old. This way the user can make sure that the most recent version is always the one saved as a Template.