Click ![]() to create a new Claim. A new blank Claim Detail area will open in the Main Window. Complete all the fields (remembering that you cannot type in the greyed out areas) that are applicable and click
to create a new Claim. A new blank Claim Detail area will open in the Main Window. Complete all the fields (remembering that you cannot type in the greyed out areas) that are applicable and click ![]() .
.
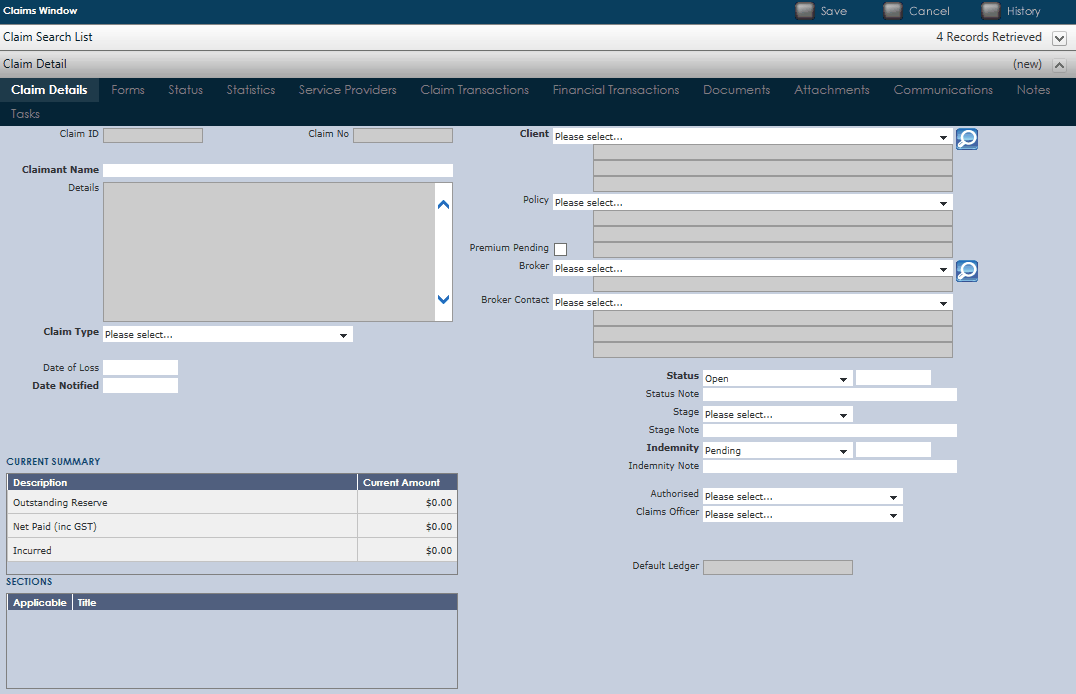
This is the first screen the user will need to enter details into at the time of creating a new Claim. This screen contains the Claim information for the Client as well as the Insurer.

•Claim ID: Every claim is Automatically allocated a Claim ID by UnderwriterCENTRAL™
•Claim No: This is automatically generated for each new Claim
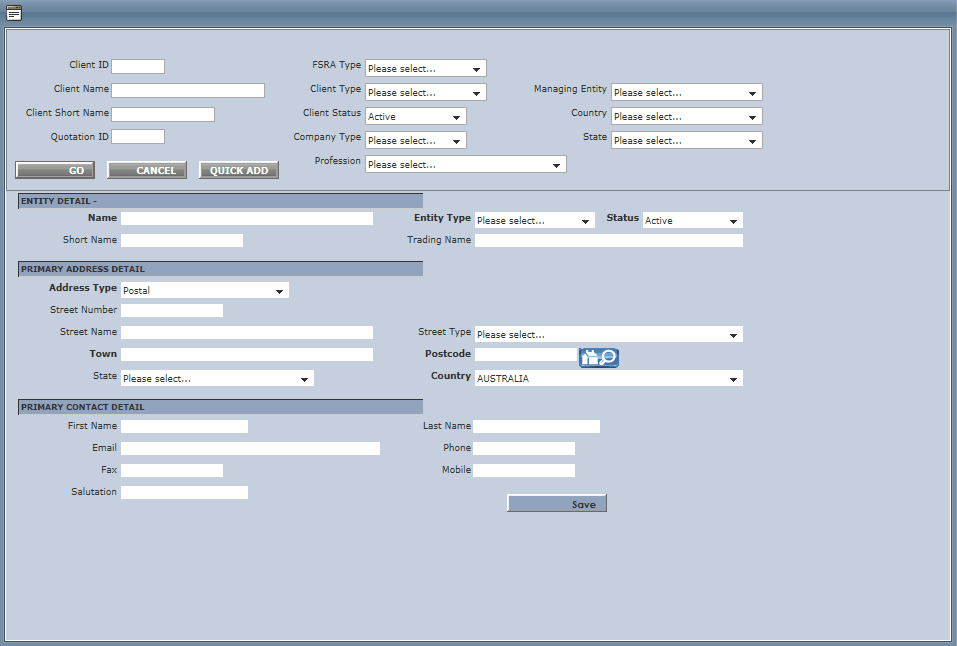
•Claimant Name: This is a free text field where the user can type in the claimant name if it differs from the name of the Client that is defaulted. If you have searched for a client record and it does not exist, you can then use the Quick Add function (QUICK ADD button) to add a new client record with limited details.
•Claim Type: Click to select the appropriate Claim Type. Making the correct Claim Type selection will assist in running correct and up to date UnderwriterCENTRAL™ claim reports.
•Date Notified: Click on ![]() to choose the date the insurers were notified.
to choose the date the insurers were notified.
•Limit: This is the limit value under the policy.
•Excess: This is the excess under the policy.
•Client: Select the client by clicking ![]() and searching for the client the claim is for. If you have searched for a client record and it does not exist, you can then use the Quick Add function
and searching for the client the claim is for. If you have searched for a client record and it does not exist, you can then use the Quick Add function ![]() to add a new client record with minimal required details.
to add a new client record with minimal required details.

•Status: Click ![]() to denote the Status of the claim and if it is under assessment or been finalised.
to denote the Status of the claim and if it is under assessment or been finalised.
•Status Note: This is a free text field where the user can type in additional information.
•Stage: Click ![]() to highlight the stage of the claim if it is in Review or Processing.
to highlight the stage of the claim if it is in Review or Processing.
•Stage Note: This is a free text field where the user can type in additional information relating to the stage of the claim.
•Indemnity: Click ![]() to highlight whether the indemnity is Pending, Accepted or Declined.
to highlight whether the indemnity is Pending, Accepted or Declined.
•Indemnity Note: This is a free text field where the user can type in additional information relating to Indemnity.
•Authorised: Click ![]() to allocate the name that authorised the Claim.
to allocate the name that authorised the Claim.
•Claims Officer: This is the officer looking after this claim.
•Authorised Rep: The user may choose from the drop down list a managing entity (company) that is authorised to be a representative for this claim.
•Authorised Rep Contact: The user may choose from the drop down list the contact details applicable to the Authorised Representative.
•Default Ledger: Is automatically updated from the policy selected.
Click ![]() to save the data.
to save the data.